In this post I am going to share how to create Master page
and page layouts in SharePoint 2013 using html file you have.
When I create Master page and page layout,
I use common .css for all pages, that I include in Master page and for each page layout I create separate .css file so that I
can manage page layout easily.
1.
Open Design Manager
2.
Click on Edit Master Pages
There are two options, you can either create using an .html
file (i.e Converting .html file to SharePoint Master page) or you can start
with startermaster page
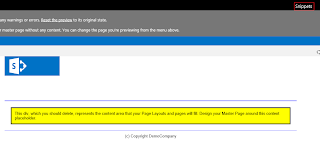
I have used below .html file (shown as image) to create my
master page:

Click on “Convert an HTML file to SharePoint master page”
and click add link to upload your or above .html file and then click Insert
button as shown below:

Once you have created, it will be displayed in the list of
master pages. Click on the master page you just created, it will show something
like shown below:
Now go to Master page and Page layouts gallery, and download
the generated .html and save it. Come back to “Master Page preview” and click
on Snippets.
I am going to add “Search box” from the snippet to the .html
master page. Click on “Search box” control, it will show below screen:

Click on “Copy to Clipboard” button, to copy the html of the
control to clipboard. Now open the generated .html master page and paste the above
copied html source to appropriate location.
Repeat the same process for Top navigation.
Here is the page created using above created master page:

Now I am going to share, how I usually create Page Layout in
SharePoint 2013.
1.
Go to Design Manager
2.
Click on “Edit Page Layouts”
3.
Click Create a page layout
For this demo purpose, I am creating a welcome page layout
with two columns and one column layout.
When you click “Create a page layout”, it asks you to
provide name, master page and content type, I have provide below details:

Once, page layout gets created, go to Master page and page
layouts gallery and download .html file of above page layout.
Remove contents between <!--MS:<asp:ContentPlaceHolder
ID="PlaceHolderMain" runat="server">--> and <!--ME:</asp:ContentPlaceHolder>-->
And add below line to associate its own .css file
<!--
custom css -->
<link type="text/css" rel="stylesheet" href="/_layouts/15/Jacobs/DemoPortal/Css/Custom_Minimal/Custom_Welcome.css"
ms-design-css-conversion="no" />
ms-design-css-conversion="no" />
Don’t forget to include “ms-design-css-conversion=no”
attribute. Go back to Design Manager, and click on “Edit Page Layouts” and then
click on newly created page layouts like shown below:

Now click on Snippet to add some web-part zones in it. When
you add web-part zone in snippet area, it shows property of that web-part zone.
The web-part zone has got a property called “Header Text” that shows the title
of the zone.
Below is an image of a page in edit mode created using above
page layout:


That’s it.